
I was sitting at my workbench last Tuesday, squinting through my jeweler’s loupe at the tiny, copper-wound motor of a 1920s mantle clock, when I realized I had no idea what my new doorbell camera was actually doing when the porch light went out. Most people think learning how to set up a security camera is just a matter of following a colorful app tutorial and screwing a plastic box to a wall, but that is a dangerous illusion. If you don’t understand the field of view, the infrared bounce, or where the data actually goes when the house is silent, you haven’t installed a security system; you’ve just decorated your porch with an expensive, blind paperweight.
I’m not here to sell you on “smart living” or show you how to sync your gadgets to your toaster. Instead, I want to show you the mechanics of sight. I will walk you through exactly how to position your lenses to catch the real movement, how to manage the power draw so you aren’t climbing ladders every week, and how to ensure your setup actually works when you are fast asleep.
Guide Overview
Tools & Supplies
- Drill with bits for mounting
- Screwdriver for housing assembly
- Smartphone for configuration
- Security camera 1 unit
- Mounting hardware 1 set
- MicroSD card 1 unit
- Power adapter 1 unit
Step-by-Step Instructions
- 1. Before you even reach for the screwdriver, you have to find the blind spots. I spent an afternoon walking around my garden with a flashlight, mimicking what a stranger might do, and realized my expensive new camera wouldn’t see a thing if someone approached from the side of the garage. Map out your perimeter by looking for where the shadows are deepest and where the natural lines of sight from your windows might be blocked by overgrown hedges.
- 2. Once you’ve picked your spots, check your signal strength. I took the camera apart last week to look at the antenna assembly, and it reminded me that even the most robust hardware is useless if the Wi-Fi signal can’t penetrate your brick walls. Take your smartphone to the exact spot where you intend to mount the device and run a speed test; if the bars drop to one, you aren’t going to get a clear image when it actually matters.
- 3. Now, let’s talk about the physical mounting. Don’t just slap it onto the siding with the included cheap plastic anchors if you can help it. I prefer to drill a pilot hole first to ensure I’m hitting something solid, like a stud or a heavy timber. You want that camera to stay perfectly still even during a thunderstorm, because a vibrating camera produces a blurry image that is about as useful as a smudge on a lens.
- 4. Wiring is where most people lose their patience, but it’s the most important part of the mechanism. If you are running a power cable, tuck it neatly into a conduit or behind a fascia board so it isn’t just hanging there like an invitation to be snipped. I always think about the mechanical integrity of the setup—if a wire is exposed, the system is incomplete, and a system that can be easily unplugged isn’t really protecting anything.
- 5. After the hardware is bolted down, it’s time to face the software, which is often the most frustrating “black box” of the whole process. Open the app and follow the pairing sequence, but don’t just click ‘next’ blindly. Look for the settings that control motion sensitivity and “activity zones.” You don’t want your phone buzzing every time a leaf blows past the porch; you want it to stay quiet until a human-sized shape enters the frame.
- 6. The final, and perhaps most vital, step is the “midnight test.” Most people set everything up at noon when the sun is bright and feel very accomplished, but cameras behave differently in the dark. Wait until the sun goes down, then go outside and check the feed to see how the infrared LEDs are performing. If the light is bouncing off a nearby wall and blinding the sensor, you’ll need to adjust the angle slightly to get a clear view of the darkness.
Mastering the Wireless Camera Installation Steps
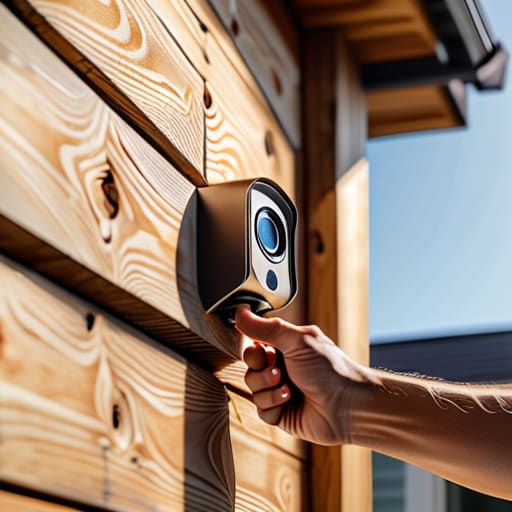
When I finally got my hands on my current unit, I didn’t just look at the casing; I opened it up to see how the Wi-Fi antenna was seated. It’s a tiny, delicate trace on the circuit board, and if your signal is weak, it’s usually because that little piece of copper is fighting through a brick wall. During your wireless camera installation steps, don’t just pick the first spot that looks good. You need to find the sweet spot where the signal is strong enough to stream, but the camera is positioned at an optimal camera mounting height—high enough to stay out of reach of a stray baseball or a curious hand, but low enough that you aren’t just filming the tops of people’s heads.
Once it’s up, you have to think about the “brain” of the operation. I spent an afternoon comparing cloud vs local video storage, and frankly, I prefer having a physical SD card in the slot. If the internet goes down, a cloud-dependent camera is just an expensive plastic paperweight. Also, please, do not forget to change your default passwords. If you leave the factory settings on, you aren’t securing your home; you’re just inviting the neighbors to watch your living room through a digital window.
Defining the Perfect Security Camera Field of View
I spent yesterday morning with my old Nikon, squinting through the lens to understand exactly how much of my garden a single sensor can actually “see.” It’s a common mistake to assume a wide angle means better protection, but a massive security camera field of view often results in a useless, washed-out image where the person you actually need to identify is just a blurry smudge in the corner. When I was teaching physics, we talked a lot about focal lengths; in practice, this means you have to decide if you want to see the whole street or just the person stepping onto your porch.
Once you’ve picked your angle, you have to consider the physics of the placement. I’ve found that the optimal camera mounting height is usually around eight to ten feet. Any higher, and you’re just filming the tops of people’s heads—which, quite frankly, tells me nothing about who they are. Any lower, and a clever thief can simply reach up and redirect the lens toward the sky. You want the camera to see the intent of a person, not just their silhouette passing through a wide, empty frame.
Five Little Details That Keep Your System From Becoming a Paperweight
- Check your Wi-Fi signal strength at the exact spot where you plan to mount the camera before you start drilling holes. I’ve learned the hard way that a signal might look strong in the living room, but once that plastic casing is tucked behind a brick wall or under an eave, the connection drops faster than a lead weight in a vacuum.
- Hide your cables behind the mounting bracket or inside a conduit. If you leave a mess of wires dangling, you aren’t just creating an eyesore; you’re giving a clever intruder a literal handle to pull your expensive little sensor right off the wall.
- Aim your cameras slightly downward rather than straight ahead. If you point a lens directly at the horizon, you’ll mostly capture the tops of passing cars and the sky; you want the angle to catch the faces and the gait of anyone walking toward your property.
- Test the infrared night vision in total darkness before you finalize the position. Some cameras reflect their own light off nearby walls or eaves, which creates a white-out effect that makes the footage as useless as a blindfold.
- Set up your motion detection zones to ignore the swaying branches of that old oak tree in your yard. If the camera triggers every time the wind blows, you’ll eventually stop checking the notifications, and that is exactly when you actually need to be looking.
The Mechanics of a Secure Perimeter
Don’t just aim for the obvious; position your lenses to catch the movement in the blind spots where a person naturally pauses, like the shadow behind a porch pillar.
A camera is only as reliable as its connection, so test your Wi-Fi signal strength at the mounting point before you start drilling holes in your siding.
Remember that a camera is a passive observer, not an active deterrent, so ensure your setup focuses on capturing clear, identifiable data rather than just a blurry shape in the dark.
The Quiet Watchman
Now that you have the hardware mounted and the field of view dialed in, you aren’t just looking at a gadget on a shelf; you’ve built a system. We’ve covered the physical placement to ensure no blind spots are left to chance, and we’ve navigated the invisible dance of wireless signals to make sure your data actually reaches your phone. Remember, a camera is only as useful as its reliability. If the signal drops when the wind blows or the lens is pointed at a useless patch of sky, the mechanism has failed its primary purpose. Check your connections one last time, ensure the power source is stable, and make sure you can see what the camera sees from your favorite chair.
There is a certain peace that comes from knowing the gears are turning correctly behind the scenes. I spent years teaching students that physics isn’t just equations on a chalkboard, but the invisible forces that keep a pendulum swinging or a circuit running. Your security system is no different. Once it is set, it should work with the silent, predictable grace of a well-oiled clock, watching over your home while you sleep. Don’t let the technology intimidate you; once you understand how it sits in its environment, it becomes a natural part of your home. Now, go ahead and close the app—you’ve done the work, and it’s time to rest easy.
Frequently Asked Questions
Will my Wi-Fi signal actually reach the porch, or am I just going to end up with a very expensive, disconnected paperweight?
I’ve spent enough afternoons staring at a dead signal to know that walls are just obstacles for radio waves. Before you mount that camera, take your smartphone out to the porch. If your video feed stutters or the bars vanish, the camera will fail too. I’d rather test the signal strength now than spend my weekend troubleshooting a “paperweight” that can’t talk to the router through two layers of brick and insulation.
If the power goes out during a storm, does the camera keep watching, or does it just go blind along with the rest of the house?
If the power cuts, your camera goes blind just like your toaster. I opened up my old wireless unit last month to see if there was a hidden capacitor meant to bridge those gaps, but it’s a simple circuit: no juice, no signal. If you want it to keep watching while the house is dark, you’ll need to plug the base station into a small UPS—a battery backup. Otherwise, you’re just left with a very expensive paperweight.
How much storage space do I really need before the memory fills up and starts overwriting the footage of my actual front door?
I had to crack open my old digital camcorder to understand how these little SD cards actually hold onto bits and bytes. It comes down to the bitrate—how much data the sensor shoves into the memory every second. If you’re recording high-definition video of your porch, you’ll eat through 64GB faster than a student through a physics textbook. I usually aim for 256GB; it gives the loop enough breathing room so your front door footage isn’t overwritten by a stray cat.